Ads
Add your AdMob app and ad unit IDs and your test phones; the assistant places the ads and asks for consent first.
Updated Oct 12, 2026
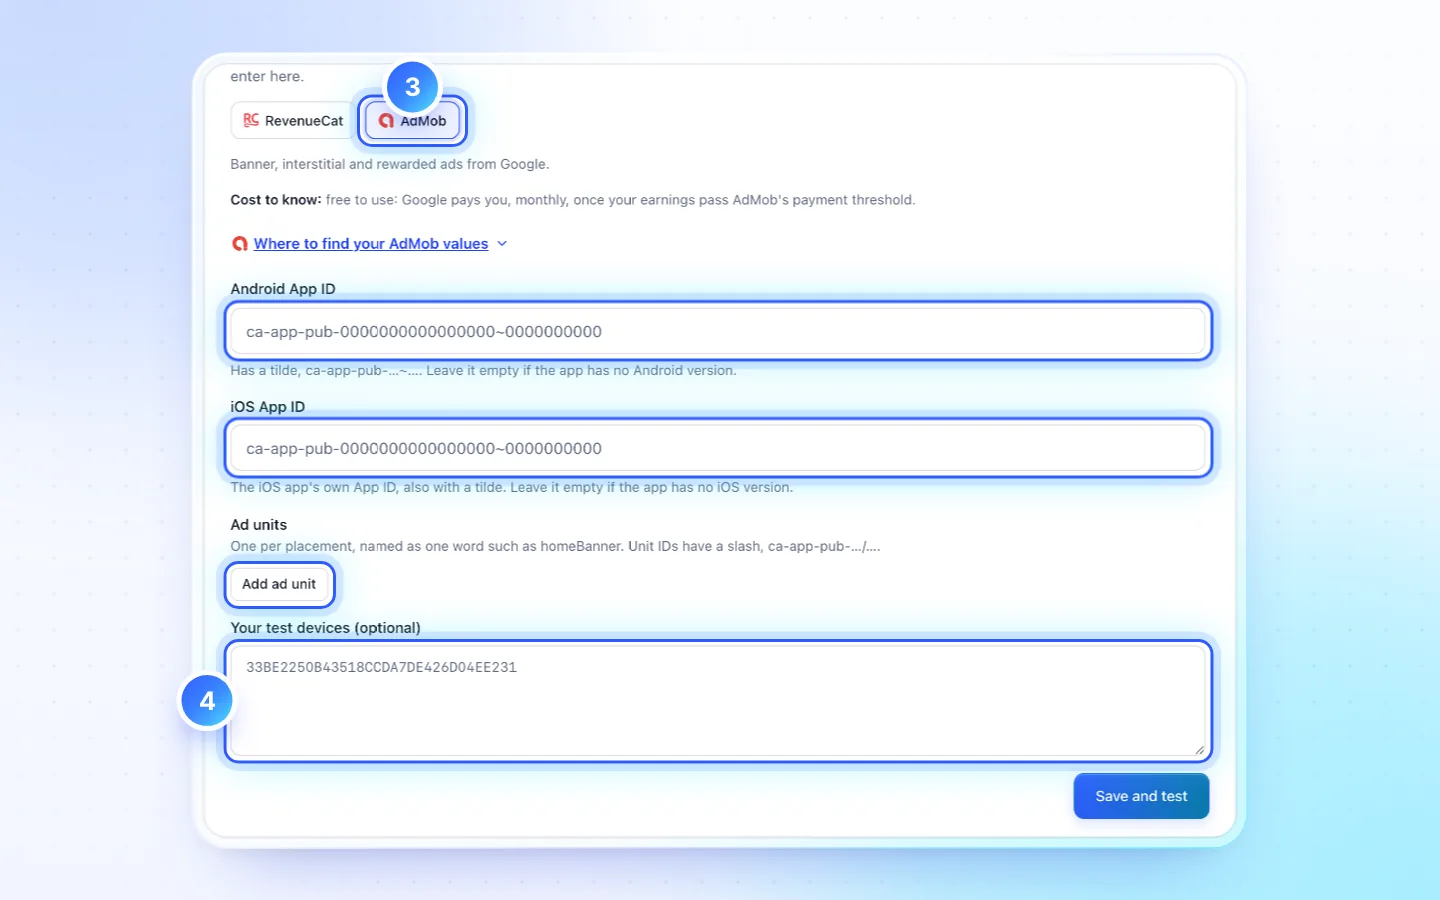
Steps
- In AdMob, choose Apps › Add app, once for Android and once for iOS. Copy each App ID (
ca-app-pub-…~…). - Under Ad units, create one unit per placement and copy its ID (
ca-app-pub-…/…). - Click Server › Monetization › AdMob and paste the IDs. Name each unit in one word, such as
homeBanner. - Add your own phones under Your test devices, one ID per line.
- Ask the assistant to place the ads.
AdMob is connected. Show homeBanner above the tab bar on Home, and
levelReward as a rewarded ad for an extra life.Before you publish
- Create and publish a GDPR message in AdMob Privacy & messaging; Google requires it in the EEA and the UK.
- Publish AdMob's
app-ads.txtat the root of the developer website on your store listing. - Declare Ads and Advertising ID in Play's App content, and advertising data in Apple's App Privacy. Publish lists both.
Good to know
- Every build is a release build with live ads. Tapping one on your own phone can get the AdMob account suspended; test devices see test ads. Ask the assistant how to find a phone's 32-character ID.
- Ads load only after consent: the GDPR message, then Apple's tracking prompt. The browser preview shows an empty slot.
- A new AdMob app serves limited ads until AdMob reviews it, usually once it is on a store.
- Apps for children follow stricter ad rules. Tell the assistant if yours is one.
Related
Did this page help?